 Table of contents in Pages app on Mac" width="1920" height="1080" />
If you’re creating a lengthy document in Pages on your Mac, inserting a table of contents is a helpful tool. Just like a book or manual, the table of contents helps the reader jump to various sections by viewing the page number.
So, if you’re wondering how to do this, we’re here to help. Here’s how to create a table of contents in Pages on Mac.
 Table of contents in Pages app on Mac" width="1920" height="1080" />
1) Open your document in Pages and click Insert from the top menu bar.
2) Move down to Table of Contents.
3) In the pop-out menu, select the type of table of contents to insert. Document will apply the table to your entire document, Section will apply the table only to the section where you’re inserting it, and To Next Occurrence will gather entries between one table of contents and another if you use more than one.

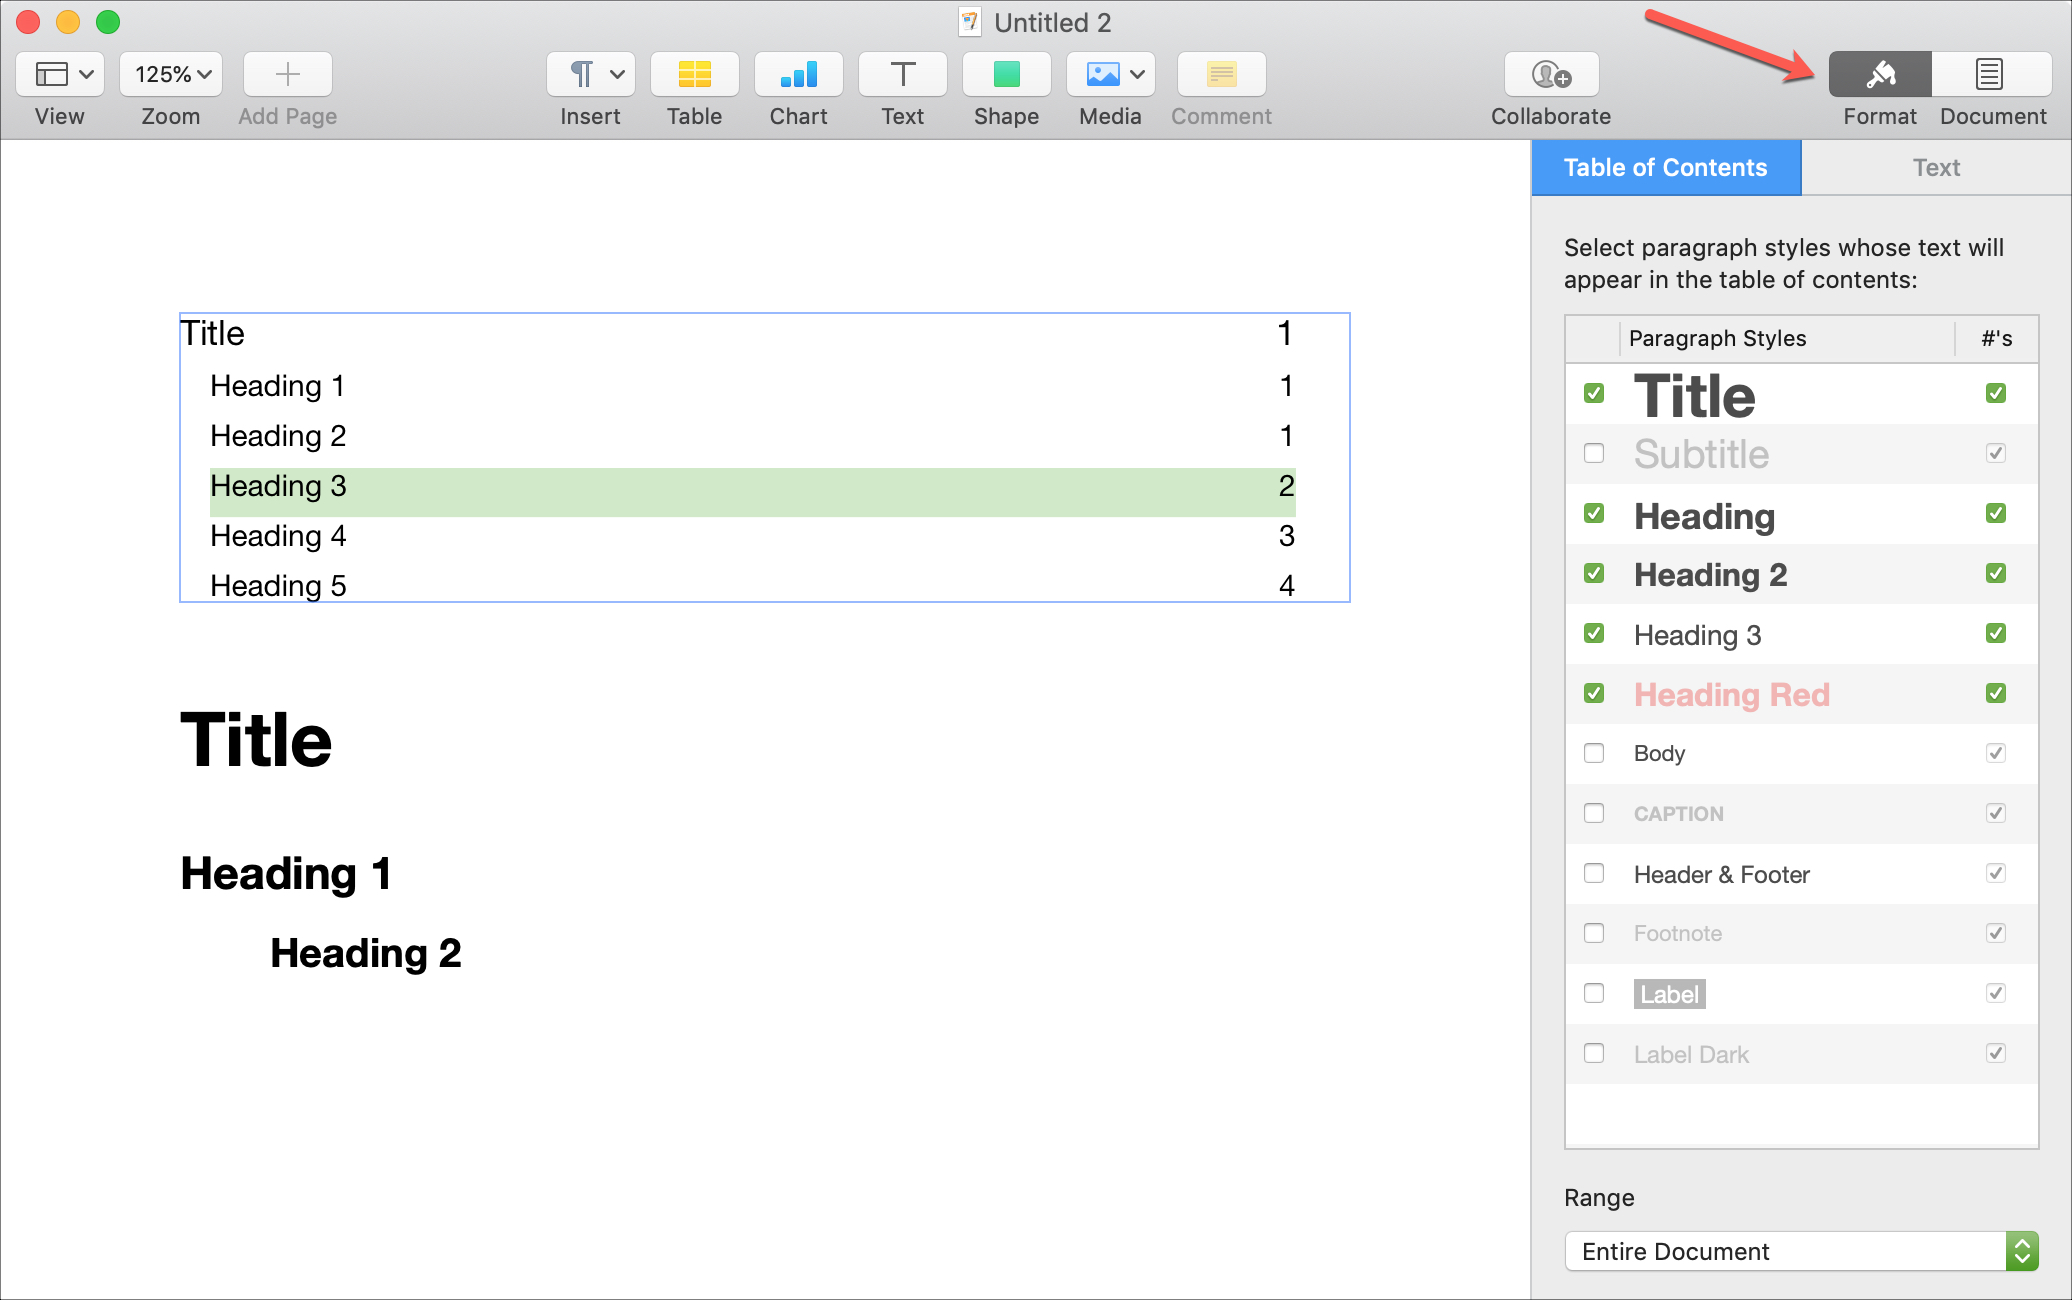
Once you insert the table of contents, you can decide which text styles to use for it.
Make sure the table is selected and that you can see Table of Contents in the right sidebar. If your sidebar is closed, click Format on the top right to open it.
Here you can check and uncheck the styles that you want to use. Just remember, you’ll need to apply your chosen styles to the text in your document for them to appear in the table of contents.

Now that you’ve inserted and formatted the table of contents, the rest is easy. As you apply the styles to your text in the document, Pages will automatically create as well as update the table for you.
One of the simplest ways to apply the text styles is to keep the sidebar open. As you type your text, the text formatting options will display. When you want to apply a style for the item to appear in the table of contents, select the very top arrow and select your style.

Inserting and using a table of contents in Pages couldn’t be easier. Is this a feature of the app that you find helpful? Let us know!
More tutorials on Pages: